Creamy Curried Carrot Soup

fullsizeoutput_1786

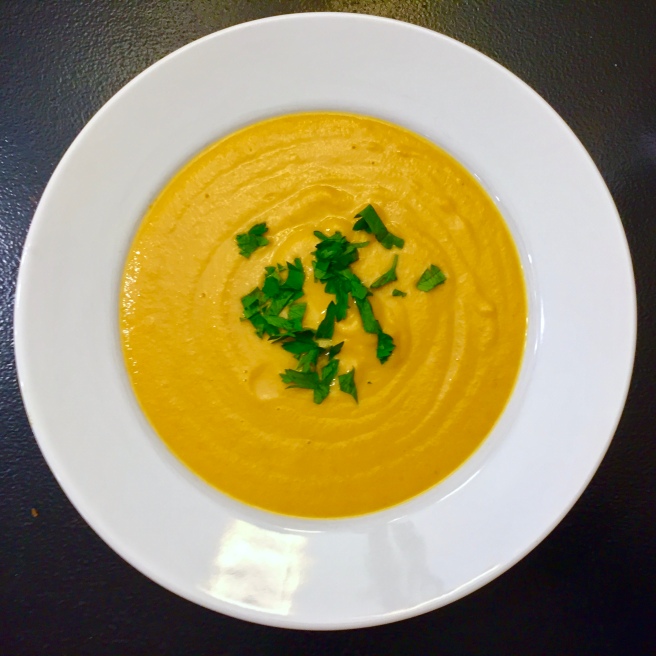
Carrots and curry seem made for each other. Throw in a little ginger and you have a great flavor combination. This creamy curried carrot soup has a velvety texture and wonderful spicy heat. It can easily be made vegetarian by substituting vegetable broth for the chicken broth. Cream of coconut could also be substituted for the heavy whipped cream. Or you can leave the cream out all together. This soup is wonderfully creamy without it and you may not miss it.

Don’t worry about peeling the carrots for this. A good scrub with a stiff vegetable brush is all they need. If you like a little more heat, increase the amount of curry or use a Madras curry.

Here is what I did:

Creamy Curried Carrot Soup

Ingredients

1/4 cup unsalted butter
4 cups sliced carrots
1 potato, peeled and cubed (about 2 cups)
1 medium yellow onion, chopped
1 stalk celery, chopped
4 cups chicken or vegetable broth
1 teaspoon ground ginger
1/2 cup heavy whipping cream or cream of coconut
1 1/2 teaspoon curry powder
Additional salt (if needed)

Directions

Heat the butter in a 5 quart stock pot or Dutch oven over medium heat. Add carrots, onion, and celery and sauté until onion is translucent; about 10 minutes. Stir in ginger and cook a few minutes. Then add potato and  chicken broth. Cover and cook, stirring occasionally, until vegetables are tender, about 30 minutes. Uncover remove from heat.

Add curry powder and using an emersion blender, blend until smooth. Stir in cream and taste for seasoning. Add additional salt if needed. Return to low heat and cook until heated through, about 10 minutes.

Alternatively, you may transfer soup in batches to a food processor or blender and blend until smooth then return soup to the stock pot or Dutch oven. Stir in cream and taste for seasoning. Add additional salt if needed. Return to low heat and cook until heated through, about 10 minutes.
French Onion Soup

fullsizeoutput_1775
Done correctly, French onion soup is very pleasing. The beefy broth and sweet onion flavors can’t be beat. Served gratinéed, it makes a nice lighter meal as opposed to a starter as it is often presented in restaurants.

I’ve had some excellent French onion soups, but I have also had a few that were less than exceptional. The difference can typically be traced back to the broth and how the onions were cooked. A good – preferably home made – beef broth should always be the base. Secondly, French onion soup takes time. The onions need to be cooked slowly over low heat so they have a chance to caramelize yet not burn. It will take 30 to 45 minutes for this to happen, but your patience will be rewarded. fullsizeoutput_1767

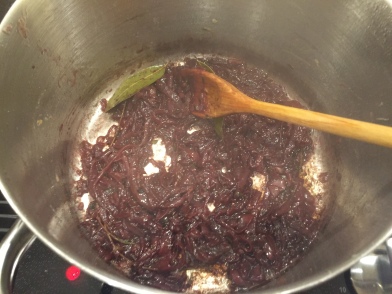
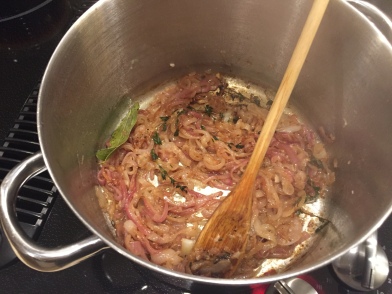
Start over low heat and slowly sweat the onions along with a couple sprigs of thyme and bay leaves. Generously season them with salt and pepper. I like to use a variety of onions including red, yellow, and white. They each bring subtle differences in flavor to the party.

2016-11-21-16-58-19


The onions will begin to caramelize after about 30 minutes. Continue cooking until the onions become very brown.
2016-11-21-16-59-29


Add red wine, bring to a boil, and then reduce reduce heat to a simmer and cook until all the wine is cooked out.

fullsizeoutput_1771
fullsizeoutput_1777fullsizeoutput_1769


The onions will once again look somewhat dry.


Turn the heat to low, dust the onions with flour and cook for about five minutes or until the flour takes on a nutty aroma. You don’t want a flour taste in your soup.

Remove the thyme sprigs and bay leaves before adding the broth. Bring back to a simmer and cook for another ten minutes. Ladle the soup into heat proof bowls, top with a slice or two of baguette and Gruyère cheese. Place the soup under a broiler and broil until the cheese is melted and just begins to brown. Serve immediately.


French Onion Soup

Ingredients

1/2 cup unsalted butter
3 onions, sliced
3 garlic cloves, chopped
2 bay leaves
2 fresh thyme sprigs
Kosher salt and freshly ground black pepper
1 cup red wine
3 heaping tablespoons all-purpose flour
4 cups beef broth
1 baguette, sliced
1/4 pound grated Gruyere

Directions

Melt the butter in a large pot over medium heat. Add the onions, garlic, bay leaves, thyme, and salt and pepper and cook until the onions are very soft and caramelized, about 30 to 45 minutes.

Add the wine and bring to a boil. Reduce the heat and simmer until the wine has cooked down and the onions are somewhat dry.

Discard the bay leaves and thyme sprigs. Dust the onions with the flour and give them a stir. Turn the heat down to medium low so the flour doesn’t burn and cook until the flour takes on a nutty aroma and loses the raw flour taste; about 10 minutes.

Now add the beef broth and bring the soup back to a simmer.  Cook for about another 10 minutes and season to taste with salt and pepper.

A few minutes prior to serving, preheat the broiler. Slice the baguette into 3/4 to 1″ thick slices and lightly toast both sides of the baguette under the broiler. Then, ladle the soup into oven proof bowls and float a slice or two of toasted baguette on top of the soup. Top the baguette with Gruyère and broil until bubbly and golden brown; 3 to 5 minutes. Serve immediately.

Chickpeas – A great snack

IMG_3560
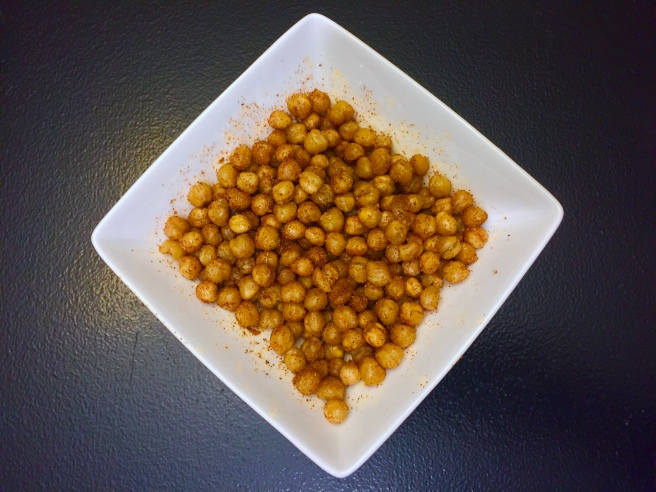
Oven roasted chickpeas.

Whether oven roasted or fried, chickpeas make a great snack and either method of making them is simple. Each method has its pluses and minuses. The oven roasting method uses less oil if that is a concern. Fried chickpeas tend to stay crispier while the oven roasted can become soft in the center after they have cooled. I provide both methods below. I would suggest trying them both to see which you prefer.

I also suggest playing around with the seasoning. Chickpeas take on seasoning well. I list a smoky, slightly spicy seasoning mix, but you can use most any. My daughter suggests cinnamon and sugar for a sweeter treat.

Here is what I did:

Oven Roasted Chickpeas

Ingredients

2 15.5 ounce cans chickpeas
1 Tablespoon olive oil
1 Teaspoon garlic powder
1/2 Teaspoon smoked paprika
1/2 Teaspoon Hungarian paprika
1/2 Teaspoon cumin
1/2 Teaspoon fine sea salt

Directions

Heat the oven to 450°F. and place an oven rack in the middle of the oven.

Drain and rinse the chickpeas thoroughly under running water.  Open the cans of chickpeas and pour the chickpeas into a strainer in the sink. Rinse thoroughly under running water.

Dry the chickpeas with a clean dishtowel or paper towels. They should look matte and feel dry to the touch. I like to let them air dry for 20 to 30 minutes if I have time. You can remove any chickpea skins that come off while drying, but otherwise don’t worry about them.

Toss the chickpeas with olive oil making sure they are evenly coated and spread the chickpeas out in an even layer on a baking sheet.

Roast the chickpeas in the oven for 20 to 30 minutes, shaking the pan every 10 minutes so they brown more evenly. Don’t be surprised to see a few chickpeas pop. The chickpeas are done when golden and slightly darkened.

Place the chickpeas in a serving bowl and sprinkle the spices over the chickpeas. Stir to coat evenly. Serve immediately.

Fried Chickpeas

Ingredients

2 15.5 ounce cans chickpeas
Vegetable oil
1 Teaspoon garlic powder
1/2 Teaspoon smoked paprika
1/2 Teaspoon Hungarian paprika
1/2 Teaspoon cumin
1/2 Teaspoon fine sea salt

Directions

Drain and rinse the chickpeas thoroughly under running water.  Open the cans of chickpeas and pour the chickpeas into a strainer in the sink. Rinse thoroughly under running water.

Dry the chickpeas with a clean dishtowel or paper towels. They should look matte and feel dry to the touch. I like to let them air dry for 20 to 30 minutes if I have time. You can remove any chickpea skins that come off while drying, but otherwise don’t worry about them.

Pour enough vegetable oil into a 12″ sauté pan to cover the bottom and heat over medium-high heat. It is best to fry the chickpeas in two batches. Carefully add half the chickpeas to the skillet and fry them until golden brown, about 5 to 10 minutes. Remove the chickpeas with a slotted spoon and place them on paper towels to drain briefly. Add additional oil if needed and fry the other half of the chickpeas.

Place all the chickpeas in a serving bowl and sprinkle the spices over the chickpeas. Stir to coat evenly. Serve immediately.

Bacon Weaved Roasted Brussels Sprouts Skewers

fullsizeoutput_116f

A lot of people claim they do not like Brussels spouts because they are bitter; that may very well be true. Brussels sprouts do contain a compound some perceive as bitter because of genetics – much like the asparagus, cilantro, arugula, and others. Another reason some taste bitterness in Brussels sprouts is because of the preparation – they are boiled or steamed.

It turns out the bitter compounds in Brussels sprouts are broken down when cooked at a much higher heat than boiling or steaming can achieve. Roasting at temperatures above 375°F will give you that result. Roasting will also cause caramelization which creates some sweetness and helps balance any remaining bitter notes.

But really – Brussels sprouts and bacon? Not much else to say here except “More please!”

Bacon Weaved Brussels Sprouts 

Ingredients

8 slices thick cut bacon
32 Brussels sprouts of similar size
Kosher salt
Fresh ground black pepper
8 wooden or metal skewers (See note)

Directions

Preheat oven to 400ºF.

Cook the bacon in a large cast iron skillet until it shows just a hint of browning but is still soft and pliable. Overcooking the bacon will make it impossible to weave onto the skewer. Remove the bacon from the pan and set it aside. Drain most of the bacon grease from the pan saving it for another use. A thin coating of bacon grease should remain in the pan.

Trim the brussels sprouts and remove the outermost leaves. Add the sprouts to the skillet, shake the skillet to lightly coat the sprouts, and season with salt and pepper. Roast in the oven until sprouts are beginning to brown or for about 15 to 20 minutes. You do not want to completely roast the sprouts at this time. They will be roasted further when skewered.

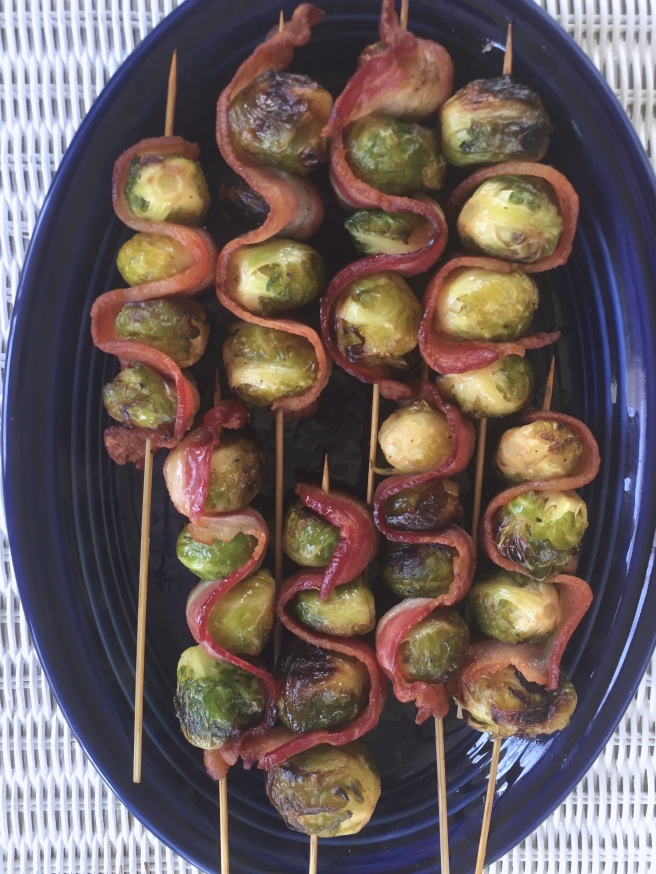
Assemble the skewers by threading 1 end of the bacon onto the end of a skewer. Add a sprout and weave the bacon around the sprout and back through the skewer. Add a second sprout and once again thread the bacon around and through the skewer. Repeat this until you have 4 or 5 sprouts on the skewer each time moving the bacon and the sprout down the skewer. Allow at least 1 inch of skewer to extend beyond the last sprout or end of bacon.

Arrange the skewers on a baking sheet and bake the skewers for 15 to 20 minutes, or until the bacon is fully cooked.

Note: I prefer to use wooden skewers. Wooden skewers will need to be soaked for several hours to help prevent them from burning. Covering the exposed wood with foil will also help prevent them from burning. Another reason to soak the skewers is to help with skewering the food and to help the food slide off after it is cooked.

There’s an app for that: Angels on Horseback

image

I love oysters. I love the salty brininess they bring to food so much that I will order them almost every time I see them on a menu except during the summer months. Yes, I follow the “R” rule and only eat oysters during months containing the letter “R.” I am told this rule no longer applies but old habits die hard.

Oysters also remind me of Christmas and my father. One family tradition while growing up was to have oyster stew on Christmas Eve after coming home from Mass and prior to opening presents. A week later, I would tag along with my father on New Year’s Day when he would go up town to the local taverns to eat raw oysters. It is because of this that I often times associate oysters with the holidays.

The following recipe is a bit of twist on the classic hors d’oeuvre Angels on Horseback. Angels on Horseback are simply shucked oysters wrapped in bacon, skewered and then baked in an oven or grilled. They are often times served on toast.

In my revision of the classic hors d’oeuvre, I first fry the bacon crisp and then use the same pan to sauté the oysters in butter, white wine, and the liquor from the oysters along with scallions and garlic. I then serve them on toast points.

Here is what I do:

Ingredients

6 Tablespoons unsalted butter
2 Tablespoons finely chopped garlic
Baguette cut on the bias into 1″ thick slices
10 Slices bacon cut into thirds
3 Scallions, finely chopped
¼ Cup white wine
2 teaspoons lemon juice, plus wedges for serving
8 to 12 oysters, shucked, with juices reserved or ½ pint shucked oysters
Kosher salt and freshly ground black pepper, to taste
Roughly chopped parsley for garnish

Directions

Heat oven to 400° F. Melt 4 tablespoons butter in microwavable bowl. Brush baguette slices with the butter and arrange on a baking sheet. Bake about 10 minutes or until lightly toasted then set aside.

While baguette is toasting, cook bacon in a 12″ skillet over medium-high heat until crispy. Transfer bacon plate lined with paper towels to drain and set aside. Drain bacon grease from pan but do not wipe pan. (Bacon grease can be used for another use.) Melt remaining butter in the skillet and then add the garlic and scallions. Cook garlic and scallions until soft; about 3 minutes. Add wine, lemon juice, and oysters with their juices. Season with salt and pepper. Cook about three minutes until oysters begin to curl at the edges. Using a slotted spoon, transfer oysters to a bowl and cover with aluminum foil to keep warm. Continue to cook sauce until thickened and reduced by half. Spoon sauce, dividing evenly, over toast points. Top each point with an oyster and two or three reserved bacon pieces. Garnish with parsley and serve immediately.

There’s an app for that: Candied Bacon

image

I am always looking for great appetizers that are easy and crowd pleasing. This recipe for candied bacon fits the bill. Make sure you use a thick-cut, good quality bacon and real 100% maple syrup. Do not use pancake syrup which is maple flavored, high fructose corn syrup.

As I said, this recipe is so easy. It only take about five minutes of prep time and 30 to 45 minutes of cook time.

image

Ingredients

1 pound good quality bacon, sliced
2 Tablespoons 100% pure maple syrup (Do not use pancake syrup.)
¼ Cup brown sugar
2 Teaspoons Dijon mustard
½ Teaspoon Kosher salt
¼ Teaspoon cayenne pepper

Directions

Preheat your oven to 350° F.

Line a rimmed baking sheet with aluminum foil and top with a wire rack. Mix the maple syrup, brown sugar, Dijon mustard, Kosher salt, and cayenne pepper in a large bowl. Add the bacon to the bowl and toss gently with your hands making sure that all of the slices are evenly coated. Place the bacon in a single layer onto the wire rack. Bake in the center of the oven for about 20 minutes. The bacon will be a bit brown, but will most likely need to bake for another 10-20 minutes depending on thickness. It should look slightly dark and crispy but not burnt. If you take it out too soon, the texture will be chewy. Patience is certainly a virtue with this.

Remove from the oven and cool for 5 minutes on the rack. Don’t let them sit too long or else they will stick. Once cool enough to handle, you can break the bacon into chards or cut roughly into thirds. You’ll have about 30 pieces. You can leave them whole if you would like.

Serve at room temperature.

There’s an app for that: Stuffed Mini Peppers

image

I am always on the lookout for quick, easy appetizers. Here is a great one for your fall parties and tailgating. The sweetness of the mini peppers balances the tanginess of the chèvre, and the herbs help kick things up to a level your guests will enjoy.

Ingredients

½ cup panko breadcrumbs
3 tablespoons olive oil, divided
20 to 25 mini bell peppers, washed
10 ounces goat cheese, softened
4 ounces cream cheeses, softened
2-3 tablespoons of your choice of herbs such as chives and thyme, chopped
black pepper

Directions

Preheat oven to 350°F. In a skillet, heat 1 tablespoon of olive oil over medium heat. Add panko bread crumbs and sauté until crumbs are golden brown. Remove from heat and set aside.

Slice peppers in half lengthwise. Do not remove stems. The stems are simply for presentation. Remove seeds and place in large bowl. Drizzle remaining olive oil over peppers and toss to coat the peppers. Then arrange peppers on a baking sheet and set aside.

Mix goat cheese, cream cheese, herbs, and pepper with a fork in a small mixing bowl until well combined. Spoon or pipe the cheese mixture into the pepper halfs. Sprinkle toasted panko bread crumbs evenly over peppers. Bake peppers for approximately fifteen minutes or until peppers are tender and the goat cheese is warm. An additional two to three minutes under the broiler may be needed to give the panko topping a little extra browning and to help heat the cheese.

A spicy side dish, appetizer, or entrée: Crab Imperial

image

This dish would make a great side dish, appetizer, or entrée as Susan and I did today. To serve as an appetizer, serve this with butter crackers or crostini. Serve in its individual ramekin if served as a side. If served as an entrée, you may want to use a slightly larger ramekin or other individual baking dish. Serve with a warm sourdough baguette.

Note: The number and size of ramekin listed here is for serving as a side.

Ingredients

8 Tablespoon unsalted butter
3 Tablespoon flour
2 cups heavy cream
1 Pound jumbo lump crabmeat, picked over for shell pieces
1½ cup Panko bread crumbs
½ cup finely chopped red bell pepper
¼ cup finely chopped yellow onion
¼ cup finely chopped parsley
2 Tablespoon sherry
2 Tablespoon fresh lemon juice
1½ teaspoon Worcestershire
1 teaspoon paprika
1 teaspoon dry mustard powder
½ teaspoon cayenne pepper
Kosher salt and freshly ground black pepper, to taste

Directions

Pre-heat oven to 400°. Begin by making a roux. Melt five tablespoons butter in a two quart saucepan over medium-high heat and add flour all at once and whisk vigorously. When mixture begins to bubble, reduce heat to medium and slow whisking. Cook until you smell a nutty aroma and cook about two minutes more stirring occasionally. Next, whisk in cream and whisk until sauce begins to bubble. Reduce heat to medium and cook, stirring constantly until thickened, about ten minutes. Remove from heat and stir in crabmeat, ½ cup bread crumbs, bell pepper, onion, half the parsley, sherry, juice, Worcestershire, half the paprika, mustard, cayenne, salt, and pepper. Divide mixture evenly among six shallow, four-ounce to five-ounce ramekins. Place ramekins on a baking sheet and set aside.

Mix remaining melted butter, bread crumbs, and paprika until evenly combined. Sprinkle seasoned bread crumbs evenly over each ramekin. Bake until lightly browned and bubbling in the center; about twenty minutes. Sprinkle with remaining parsley and serve hot.

There’s an app for that: Jalapeño Poppers

Everybody loves jalapeño poppers. They are just the right amount of spicy balanced with the right amount of creamy cheesiness, and by God they have bacon. Who could ask for anything more? Oh, a nice Raspberry-Merlot sauce to dip them in? Sure thing.

Jalapeño Popper

Ingredients

6 good sized jalapeño peppers
3 slices of smoked bacon (cut in half to make six pieces)
4 ounces softened cream cheese
1 cup shredded sharp cheddar cheese (Approximately)

Directions

Bring cream cheese to room temperature. Preheat oven to 425° F. Cook the bacon on a plate lined with paper towel in a microwave until almost crisp, approximately 3 to 4 minutes. Wash and slice the jalapeños in half length-wise. Deseed the peppers also removing as much of the inner rib as possible. Blend the cream cheese and cheddar cheese together very well. Next, fill each half of the jalapeño with cream cheese and cheddar mixture. Place on baking sheet filling side up and top each pepper with a half slice of bacon. Bake in oven until cheese is bubbly, bacon is very crisp, and jalapeno is beginning to soften: approximately 15 to 20 minutes. Remove from oven and allow to cool a few minutes. Serve with Raspberry-Merlot sauce.

Raspberry-Merlot Sauce

Ingredients

2 packages frozen, unsweetened raspberries (about 4 cups)
1 ½ cups Merlot wine
1 cup sugar

Directions

In a medium sauce pan, combine all ingredients. Stir and bring to a boil over high heat. As soon as mixture comes to a boil, reduce heat to medium-low and simmer uncovered until the mixture is thick and reduced to about 1 cup: about 30 minutes. Occasionally stir the sauce to prevent scorching. Allow to completely cool before serving.

Louisiana Oysters on the Half-Shell

I picked up some Louisiana Oysters today. I made a very quick and simple migonette sauce for them and Susan and I were in heaven. I wanted us to have at least three a piece so I picked up eight oysters just in case there was a bad one. We got lucky and all eight looked bright and smelled like the briny sea so we each got four.

Here’s the simple migonette sauce:

Ingredients

1 small shallot finely minced
2 Tablespoons rice vinegar
2 Tablespoons dry, acid white wine
1 Tablespoon chopped flat leaf parsley
Grind or two of fresh ground black pepper

Directions

Combine all ingredients in a small bowl and refrigerate an hour or two to allow the flavors to meld. Spoon over oysters and serve.