Asparagus and Crab Stuffed Walleye

IMG_2988
Asparagus and Crab Stuffed Walleye served with a Green Bean and Radish Salad.

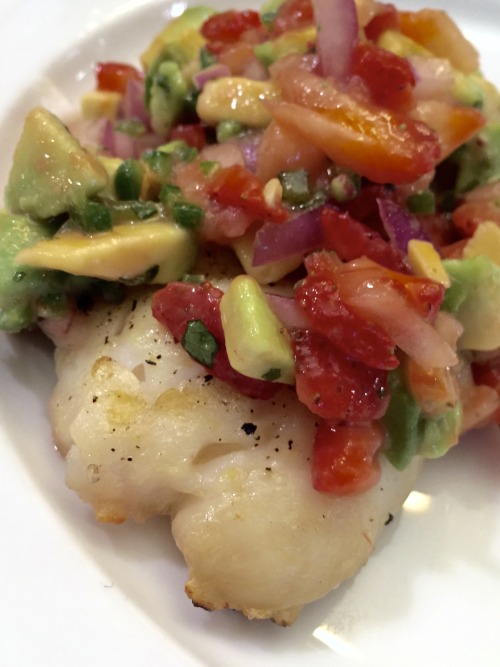
I like dinners that are elegant and look like you spent a lot of time preparing but actually come together quite easily and quickly. My Asparagus and Crab Stuffed Walleye is one of those meals. This entrée would be met with oohs and aahs if served at a dinner party.

I prepared this with fresh walleye however any mild tasting white fish would work well with it. What ever fish you choose, just be sure that the flavor of the fish compliments the boldness and doesn’t muddle the flavor of the crab. It pains me to say this, as I have a general dislike of the fish, but Tilapia would be a good choice for this. I like to describe Tilapia as the true chicken of the sea: bland, boring, and over farmed. I chose walleye because I believe the mild, somewhat sweet flavor works well with the crab.

Here is what I did:

Asparagus and Crab Stuffed Walleye

Ingredients

Fish
2 Walleye fillets or other white fish, skin removed
1 Tablespoon olive oil
1/2 Cup shallot, minced
2 Cloves garlic, minced
6 ounces crab lump crab meat (pouch or canned is suitable)
1/4 Cup ricotta cheese (whole milk)
1 Teaspoon Old Bay Seasoning
3 Tablespoons chives, chopped
Kosher salt
Fresh ground pepper
6 spears asparagus trimmed just a little wider than width of fillet

Lemon Butter Sauce
3 Tablespoons unsalted butter (plus a little more for buttering the baking dish)
Juice from one large lemon (Approximately 4 tablespoons)

Directions

Preheat oven to 375°F.

Heat olive oil in skillet over medium low heat and gently sautée shallots. Add garlic when shallots are translucent and just beginning to brown. Add crab meat, ricotta, Old Bay Seasoning, chives, salt, and pepper. Stir to fully blend ingredients together. Remove from heat and allow to cool.

Lay out fillets on cutting board. Check over for pin bones while patting dry. Divide crab mixture between fillets spreading evenly the whole length of the fish. Place three asparagus spears on the widest end of each fillet. Roll up the fillet beginning with the asparagus end and place the fillet seam down in a lightly buttered glass or ceramic baking dish.

Melt butter. Briefly whisk melted and lemon juice in a small bowl then then drizzle all but about two tablespoons of mixture over fillets. Sprinkle a little Old Bay Seasoning over fillets for color.

Bake crab stuffed fillets for about 20-25 minutes or until they flake easily with fork. It will depend on the size of your fish. Start checking them after 15 minutes if you have smaller fillets.

Advertisement

Crab Cakes

image


Sometimes I think I live in the wrong part of the country. I really do like living in Iowa for the most part, but there are times I really wish had access to fresh seafood. I love salmon and other fish. Lobster rolls? Yes, please! Oysters? I’ll take a bushel. And then there are crabs. Because I live in Iowa, fresh crab meat is hard to find, and when you do find it, it is pricey.

Crab season begins on the first of April on the east coast and runs through fall. This tends to bring the price down a bit, but it is still relatively expensive.

Crab can still be enjoyed here in the midwest.  One of my favorite ways to do so is crab cakes. I like them because all the hard work is done for you when you sit down to eat.

My daughter and her boyfriend are vacationing on the East coast this summer.  I’ve been told his main objective is to eat all the crab and lobster he can. Maybe they’ll bring home some fresh crab for me.

Here is what I do:

Crab Cakes

Ingredients

2 large eggs
2 tablespoons mayonnaise
2 teaspoons Dijon mustard
1 teaspoon Worcestershire sauce
2 teaspoons Old Bay seasoning
¼ teaspoon fine sea salt
2 finely chopped scallions
½ cup finely chopped red bell pepper (approximately 1 small pepper)
2 tablespoons finely chopped fresh parsley
1 pound lump crab meat
½ cup panko
Oil for cooking

Directions

Line a baking sheet with aluminum foil.

Combine the eggs, mayonnaise, Dijon mustard, Worcestershire, Old Bay, salt, celery, scallions, red bell pepper, and parsley in a large bowl and mix well. Add the crab meat (be sure to check the meat for any hard and sharp cartilage or shell and remove) and panko. Gently fold mixture together until just combined, being careful not to shred the crab meat. Shape into 6 crab cakes using a ½ cup measuring cup and place on prepared baking sheet. Cover and refrigerate for at least 1 hour.

Preheat a large skillet to medium heat and coat with oil; no more than ¼ inch deep. When oil is hot, place crab cakes in pan and cook until golden brown, about 3-5 minutes per side. Be careful as oil may splatter. Serve immediately with tartar sauce or my Chipotle Lime Sauce. Recipe follows below.

Note: Do not skip the refrigeration step. Refrigerating the cakes will help prevent them from falling apart during cooking.


Chipotle Lime Sauce

Ingredients

½ cup mayonnaise
1 canned chipotle chili in adobo sauce
1 tsp fresh lime juice

Directions

Puree mayonnaise, lime juice, and chipotle pepper in a small blender. Cover and refrigerate for at least one hour; best if made the day before.

Tuna Pot Pie

image

Two tuna pot pies made in 5″ individual pie pans.

image

Ready for the oven.

image

Guilty pleasures. We all have them. When it comes to food, I have a number of them, but I attribute one directly to my mother.

My mother was a wonderful cook who fed us well. She took a lot of pride in creating healthy, honest food for us. She seldom purchased pre-packaged foods and made most things from scratch. Sure there was Campbell’s cream of tomato soup with grilled cheese for a quick lunch during busy times, but my mother would never use Hamburger Helper or that blue box of macaroni and cheese. What she would buy though were frozen pot pies. Specifically, Banquet frozen tuna pot pies. I loved them! My sister loved them. My father would eat two when she made them.

I can’t quite figure out why a mother would refuse to buy Kraft Macaroni and Cheese because “her kids were never going to eat out of a box” yet she had no problem buying tuna pot pies.

Banquet stopped production of the tuna pot pie at some point. They still make chicken, beef, and turkey, but they are not nearly as good. My mother tried her hand at making her own tuna pot pie but, like all the other recipes I have found, it was very dry and the flavor just wasn’t there. Banquet tuna pot pies had a very gooey, saucy filling with just the right tuna, peas, and carrot ratio. Swanson had a tuna pot pie, but I did not care for them, mainly because Swanson decided to forgo the bottom crust and only had a top crust. They too stopped production around the same time.

For years, I have been on mission to recreate this bit of childhood comfort food, my guilty pleasure. All the recipes I found did not have that sauciness or were made using cans of gloppy, salt laden cream of mushroom soup. They certainly did not taste like the Banquet tuna pot pies I remember. After many trials and errors, I believe I have come up with a recipe for a tuna pot pie that rivals the taste and saucy filling I remember.

Here is what I did:

Tuna Pot Pie

Ingredients

Pie crust (top and bottom crust for one 9 inch or two 5 inch pies)

¼ cup unsalted butter
¼ cup all purpose flour (30 grams)
1 cup vegetable broth
1 cup whole milk
1 bay leaf
2 5 ounce cans tuna (drained)
2 ounces sliced Pimiento peppers
1 cup frozen mixed peas and carrots
Kosher salt
Fresh ground pepper

Directions

Preheat oven to 450°F.

Melt butter in 2 quart sauce pan over medium heat. Stir in flour and cook, stirring constantly, until mixture is smooth and bubbly and takes on a nutty aroma; approximately 5 minutes. Slowly stir in vegetable broth and then milk. Add bay leaf and season with salt and pepper. Heat, stirring frequently, until thickened and just beginning to bubble. Remove from heat. Stir in tuna, then Pimiento peppers, then frozen peas and carrots. Taste and season accordingly with salt and pepper.

Roll out bottom pie crust to fit either one 9 inch pie pan or two 5 inch pie pans. Place bottom crust in pie pan(s). Remove bay leaf and spoon filling into bottom crust. Roll out top crust and gently place crust over filling; fold edge under and crimp, sealing to bottom crust. Cut slits in top crust. Bake 15 minutes at 450°F. Reduce heat to 350°F and continue baking another 30 to 35 minutes. If crust is getting too brown, cover pies with aluminum foil.

Remove from oven and let cool 15 to 20 minutes before serving.

Red Snapper with Strawberry Avocado Salsa

tumblr_inline_o20ycjAj9o1qk7oiw_500

Don’t get me wrong, I love a good fish fry, and during Lent there are many to choose from in Cedar Rapids. However, a person can only eat so much deep-fried fish, and I really do not like deep frying anything, let alone fish, inside my house. (I set up my fryer outside or in the garage when I do deep-fry.)

This red snapper topped with a strawberry-avocado salsa is a welcome flavor fest this time of year and it just may get you through the last days of winter doldrum.

The red snapper can be cooked several different ways for this recipe and each of them are equally good. I have grilled, pan seared, and broiled the fish while making this and each time with excellent results.

If using a gas grill, I like to heat the grill to high temperature and then turn the burners down. This gets the grates very hot and the residual heat helps cook the foods. You will need a good 15 to 20 minutes to get the grill up to its high temp and then another 10 to 15 minutes for the grill to balance out the temperature to your desired cooking temp.

If broiling, begin with fish skin side up about 6 inches from broiler.

If pan-searing, you will need an additional 2 tablespoons of your preference of olive or vegetable oil. I recommend using a cast iron skillet if pan-searing.

Here is what I did:

Red Snapper with Strawberry Avocado Salsa

Ingredients

1 jalapeño pepper, stemmed, seeded and finely chopped
2 cups strawberries, hulled and medium chopped
¼ cup finely chopped red onion
2 tablespoons finely chopped cilantro
1 teaspoon lime juice
1 ripe avocado, peeled, pitted and diced
Salt and pepper to taste
1 tablespoon extra virgin olive oil
1 ½ tablespoon finely grated lime zest
4 (5- to 6-ounce) skin-on red snapper fillets

Directions

In a medium bowl, stir together jalapeños, strawberries, onions, cilantro, lime juice, avocado and salt to make a salsa. Set aside. I prefer to make this several hours ahead to allow the flavors to marry.

Preheat grill to medium heat, heat broiler to high, or heat 2 tablespoons oil in cast iron skillet on medium-high heat.

Meanwhile, prep the fish by combining oil and zest in a small bowl then brush all over both sides of fillets. Season both sides with salt and pepper. When grilling, grill fillets skin side down and do not flip. Grill until just cooked through and crisp around the edges; about 8 to 10 minutes. For pan-searing, begin with fish skin side down. Cook for 4 to 5 minutes and flip cooking an additional 4 to 5 minutes. If broiling, begin with the fish skin side down and broil for 3 to 4 minutes then flip and broil skin side up for and additional 5 to 6 minutes. For all methods of cooking, the fish will become opaque and easily flake when thoroughly cooked. Remove and discard skin and transfer to plates. Top with salsa and serve.

There’s an app for that: Angels on Horseback

image

I love oysters. I love the salty brininess they bring to food so much that I will order them almost every time I see them on a menu except during the summer months. Yes, I follow the “R” rule and only eat oysters during months containing the letter “R.” I am told this rule no longer applies but old habits die hard.

Oysters also remind me of Christmas and my father. One family tradition while growing up was to have oyster stew on Christmas Eve after coming home from Mass and prior to opening presents. A week later, I would tag along with my father on New Year’s Day when he would go up town to the local taverns to eat raw oysters. It is because of this that I often times associate oysters with the holidays.

The following recipe is a bit of twist on the classic hors d’oeuvre Angels on Horseback. Angels on Horseback are simply shucked oysters wrapped in bacon, skewered and then baked in an oven or grilled. They are often times served on toast.

In my revision of the classic hors d’oeuvre, I first fry the bacon crisp and then use the same pan to sauté the oysters in butter, white wine, and the liquor from the oysters along with scallions and garlic. I then serve them on toast points.

Here is what I do:

Ingredients

6 Tablespoons unsalted butter
2 Tablespoons finely chopped garlic
Baguette cut on the bias into 1″ thick slices
10 Slices bacon cut into thirds
3 Scallions, finely chopped
¼ Cup white wine
2 teaspoons lemon juice, plus wedges for serving
8 to 12 oysters, shucked, with juices reserved or ½ pint shucked oysters
Kosher salt and freshly ground black pepper, to taste
Roughly chopped parsley for garnish

Directions

Heat oven to 400° F. Melt 4 tablespoons butter in microwavable bowl. Brush baguette slices with the butter and arrange on a baking sheet. Bake about 10 minutes or until lightly toasted then set aside.

While baguette is toasting, cook bacon in a 12″ skillet over medium-high heat until crispy. Transfer bacon plate lined with paper towels to drain and set aside. Drain bacon grease from pan but do not wipe pan. (Bacon grease can be used for another use.) Melt remaining butter in the skillet and then add the garlic and scallions. Cook garlic and scallions until soft; about 3 minutes. Add wine, lemon juice, and oysters with their juices. Season with salt and pepper. Cook about three minutes until oysters begin to curl at the edges. Using a slotted spoon, transfer oysters to a bowl and cover with aluminum foil to keep warm. Continue to cook sauce until thickened and reduced by half. Spoon sauce, dividing evenly, over toast points. Top each point with an oyster and two or three reserved bacon pieces. Garnish with parsley and serve immediately.

A spicy side dish, appetizer, or entrée: Crab Imperial

image

This dish would make a great side dish, appetizer, or entrée as Susan and I did today. To serve as an appetizer, serve this with butter crackers or crostini. Serve in its individual ramekin if served as a side. If served as an entrée, you may want to use a slightly larger ramekin or other individual baking dish. Serve with a warm sourdough baguette.

Note: The number and size of ramekin listed here is for serving as a side.

Ingredients

8 Tablespoon unsalted butter
3 Tablespoon flour
2 cups heavy cream
1 Pound jumbo lump crabmeat, picked over for shell pieces
1½ cup Panko bread crumbs
½ cup finely chopped red bell pepper
¼ cup finely chopped yellow onion
¼ cup finely chopped parsley
2 Tablespoon sherry
2 Tablespoon fresh lemon juice
1½ teaspoon Worcestershire
1 teaspoon paprika
1 teaspoon dry mustard powder
½ teaspoon cayenne pepper
Kosher salt and freshly ground black pepper, to taste

Directions

Pre-heat oven to 400°. Begin by making a roux. Melt five tablespoons butter in a two quart saucepan over medium-high heat and add flour all at once and whisk vigorously. When mixture begins to bubble, reduce heat to medium and slow whisking. Cook until you smell a nutty aroma and cook about two minutes more stirring occasionally. Next, whisk in cream and whisk until sauce begins to bubble. Reduce heat to medium and cook, stirring constantly until thickened, about ten minutes. Remove from heat and stir in crabmeat, ½ cup bread crumbs, bell pepper, onion, half the parsley, sherry, juice, Worcestershire, half the paprika, mustard, cayenne, salt, and pepper. Divide mixture evenly among six shallow, four-ounce to five-ounce ramekins. Place ramekins on a baking sheet and set aside.

Mix remaining melted butter, bread crumbs, and paprika until evenly combined. Sprinkle seasoned bread crumbs evenly over each ramekin. Bake until lightly browned and bubbling in the center; about twenty minutes. Sprinkle with remaining parsley and serve hot.

A great alternate burger: Salmon Burger

A burger is a burger. Or is it? Here is a great alternative burger made with salmon. Salmon burgers don’t always hold up on a grill so what I like to do is use my grill initially as a stove. I place a cast iron skillet on the grill, get it good and hot, and then give the salmon burgers a quick sear before moving them directly to the grill. Here’s what I do:

Ingredients

1 ½ pounds skinless, boneless salmon
2 teaspoons Dijon mustard
2 shallots, peeled and cut into chunks
½ cup Panko bread crumbs
1 tablespoon capers, drained
Salt and freshly ground black pepper
2 tablespoons butter or olive oil

Directions

Cut the salmon into large chunks and put about a quarter of it into the container of a food processor, along with the mustard. Process until the mixture becomes pasty, scraping the sides down as necessary.

Add the shallots and the remaining salmon, and pulse the machine until the fish is chopped and combined with the puree. No piece should be larger than a quarter inch or so; be careful not make the mixture too fine.

Transfer the salmon into a bowl, and stir in the bread crumbs, Dijon mustard, capers, and some salt and pepper. Shape into four burgers.

Place the butter in a 12-inch cast iron skillet and place directly on a grill heated to high heat. Place the patties in the skillet when the butter is melted and just begins to brown. Cook for a minute or two on each side and then transfer directly to the grill. Cook an addition two to three minutes per side. Be careful not to overcook. Serve on a toasted bun with Blind Guy’s Fish Sauce (recipe follows) or your favorite sauce.

Blind Guy’s Fish Sauce

Ingredients

½ cup mayonnaise
¼ cup fresh parsley, chopped
1 tablespoon Dijon mustard
1 tablespoon fresh lemon juice
2 teaspoons prepared white horseradish

Directions
Whisk together mayonnaise, parsley, mustard, lemon juice, and horseradish in a small glass bowl. Chill for at least one hour before serving.

Lemon-Rosemary Grilled Yellowfin Tuna Steaks


Lemon zest, rosemary, and garlic ready to be minced.


Lemon zest, rosemary, and garlic along with Kosher salt and fresh ground pepper ready to be pressed onto the tuna steaks.

I really like tuna but not simply out of a can, although canned tuna has its merits. When I say I like tuna, I’m referring to tuna steaks: pan seared, broiled, or grilled. They are so easy and quick to cook. A quick four to six minutes per side is all it takes. Yes, they will be pink in the middle but over cooked tuna is mortal sin.

Here’s what I did tonight:

Ingredients

2 fresh tuna steaks, 6 to 8 ounces each and approximately 1-inch thick
1 lemon, zested
fresh rosemary, about 2 large sprigs with leaves stripped from stem
3 cloves garlic, crushed
Coarse salt and black pepper
Extra-virgin olive oil

Directions

Rinse and pat tuna steaks dry. Zest lemon on top of cutting board into a small mound. Place rosemary leaves on top of zest. Slightly crush garlic and place on top of rosemary. Finely chop the garlic, rosemary and lemon zest. About half-way through, season with Kosher salt and black pepper. Drizzle just enough olive oil over the tuna steaks to coat each side. Rub herb and garlic mixture into fish, while lightly pressing the mixture into the flesh and coating pieces evenly on each side. Let stand 10 minutes.

Grill tuna steaks no more than six minutes on each side over medium high heat on grill.

Cedar Planked Grilled Salmon with Avocado Salsa

What I really like about salmon is the infinite ways it can be cooked and the wide range of seasonings you can use. Tonight I cooked our salmon on a cedar plank, one of my favorite ways by the way, and topped it with an avocado salsa. Not only was this dish very tasty, it was a double source of omega-3. Win-win!

Here’s what I did:

Ingredients

Salmon
1 to 1 ½ lb salmon filet
1 tbs olive oil
1 tsp salt
1 tsp ground coriander
1 tsp ground cumin
1 tsp smoked paprika powder
1 tsp onion powder
1 tsp black pepper

Avocado salsa
1 avocado, peeled, seeded and sliced
1 small red onion, sliced
1 large jalapeño peppers, diced or sliced (red if available)
Juice from 2 limes
3 tbs olive oil
2 tbs finely chopped cilantro
Salt to taste

Directions

Prior to grilling, soak a cedar plank in water for at least two hours.

In a glass bowl, mix the salt, coriander, cumin, paprika, onion and black pepper together. Rub the salmon with the seasoning mix and let the fish rest for at least 30 minutes.

Pre-heat the grill to medium heat: 350° to 375°.

Meanwhile combine the avocado, onion, jalapeño, cilantro, lime juice, olive oil and salt in a glass bowl and mix well, chill until ready to use.

Place the seasoned salmon on the soaked cedar plank and grill the salmon for 10 to 15 minutes. Remove the salmon from the grill and allow to rest 5 to 10 additional minutes. Top with the avocado salsa and serve.

Jazz up your fish: Mustard-Grilled Red Snapper

Red snapper is a firm, mildly flavored, white-fleshed fish that can be prepared in a wide variety of dishes; from a very simple dish to a gourmet meal. My favorite way to prepare red snapper is grilled with a spicy Dijon mustard sauce. Here’s what I do:

Ingredients

1/3 Cup Dijon mustard
2 teaspoons red wine vinegar
½ teaspoon ground cayenne pepper
2 Red Snapper filets (6 to 8 ounces each)

Directions

Heat grill to medium-high for direct grilling.

Meanwhile combine mustard, vinegar and red pepper in small glass bowl and whisk well. Coat both sides of fish thoroughly with mustard mixture.

Grill fish over direct heat on a covered grill over medium-high heat. Grill approximately 5 minutes and one side and then turn and grill an additional 4 to 5 minutes on the other side or until fish flakes easily when tested with fork. Garnish with parsley sprigs and serve.